ORDERS $150+ SHIP FREE
Campfire Beer Can Chicken
February 04, 2019

Harry Fisher cooling off the chook and adding some Irish flavours at the same time. 📷 Fire to Fork
Camping Food | Campfire Beer Can Chicken
After cooking beer can chicken is a few times and nailing it and not nailing it, I decided to go back to to good old roast chook.
If you are ever in Perth and have a spare day up your sleeve and like BBQ then check out Urban Griller. Chris runs a pretty extensive course on all things BBQing. This is one of the best cooking classes I have ever attended and to this day the BBQ tips & tricks learnt on this full on day of cooking have stuck with me in all the cooking I do now.
Most cook books will state 'insert a half can of beer into the chicken cavity" after you have consumed half of the can. This is a bit of a problem that makes so much sense when explained. If the can is cold (of course it is) then it needs to warm up and boil for the steam to seal the inside of the cavity at the same time the outside cooks to lock in all those yummy juices. Thats right! The job of the can of beer is to seal the inside cavity of the chook using heat so the hotter the beer the better but does beer actually reach boiling point and produce steam?
Beer Can Coal Chicken
I had an idea that had been playing in my head for some time and I needed someone with passion for bush cooking to share the idea. So when Harry from Fire to Fork and I organised a campout get together and the idea was pitched, Harry got onboard. A different spin on beer can chicken we both believed would work.
How do you cook a beer can chicken?
How do you cook a beer can chicken? What if we could seal the inside of the chicken almost straight away? Would this capture more juices? Righto!
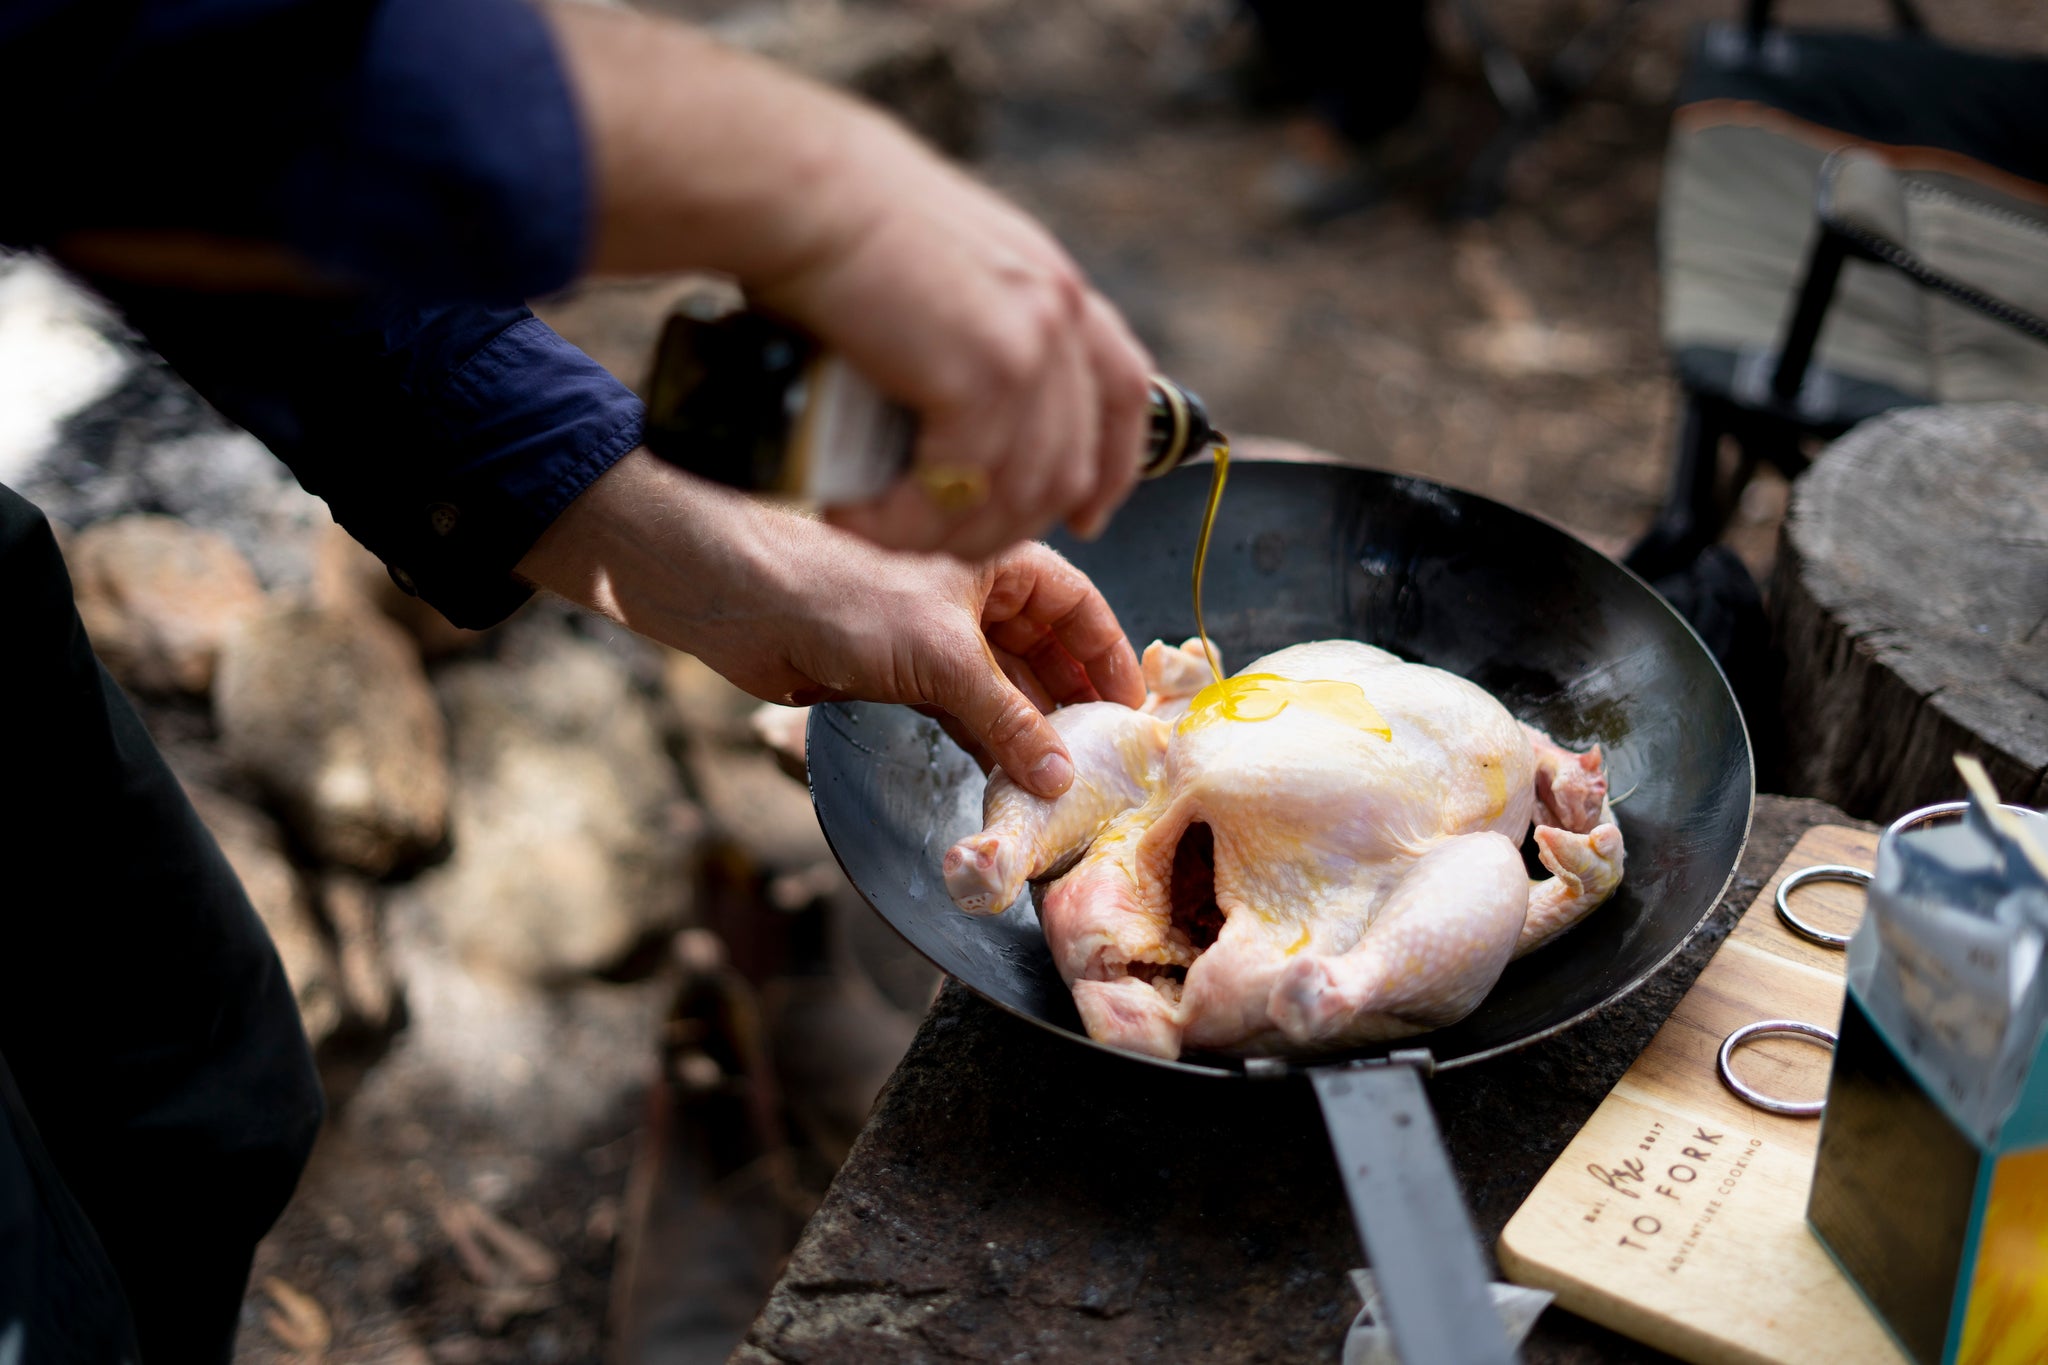
Rub the chook with lemon infused oil. 📷 Fire to Fork
Get yourself a cold beer to drink and drink it. While drinking it give your chicken a rub with some lemon infused olive oil and don't be shy. Everything that runs off will be perfect for basting. I've always been a fan of using a few lemon and ginger tea bags torn open and sprinkled over. A nice Aussie local Lemongrass and Ginger XO Tea was thieved from our pantry for this chooks costume as well as the usual salt and pepper. This flavour trio of lemongrass, ginger with chicken is a hard one to beat. Add flames, beer, lemon infused oil and it's enough to silence the camp.
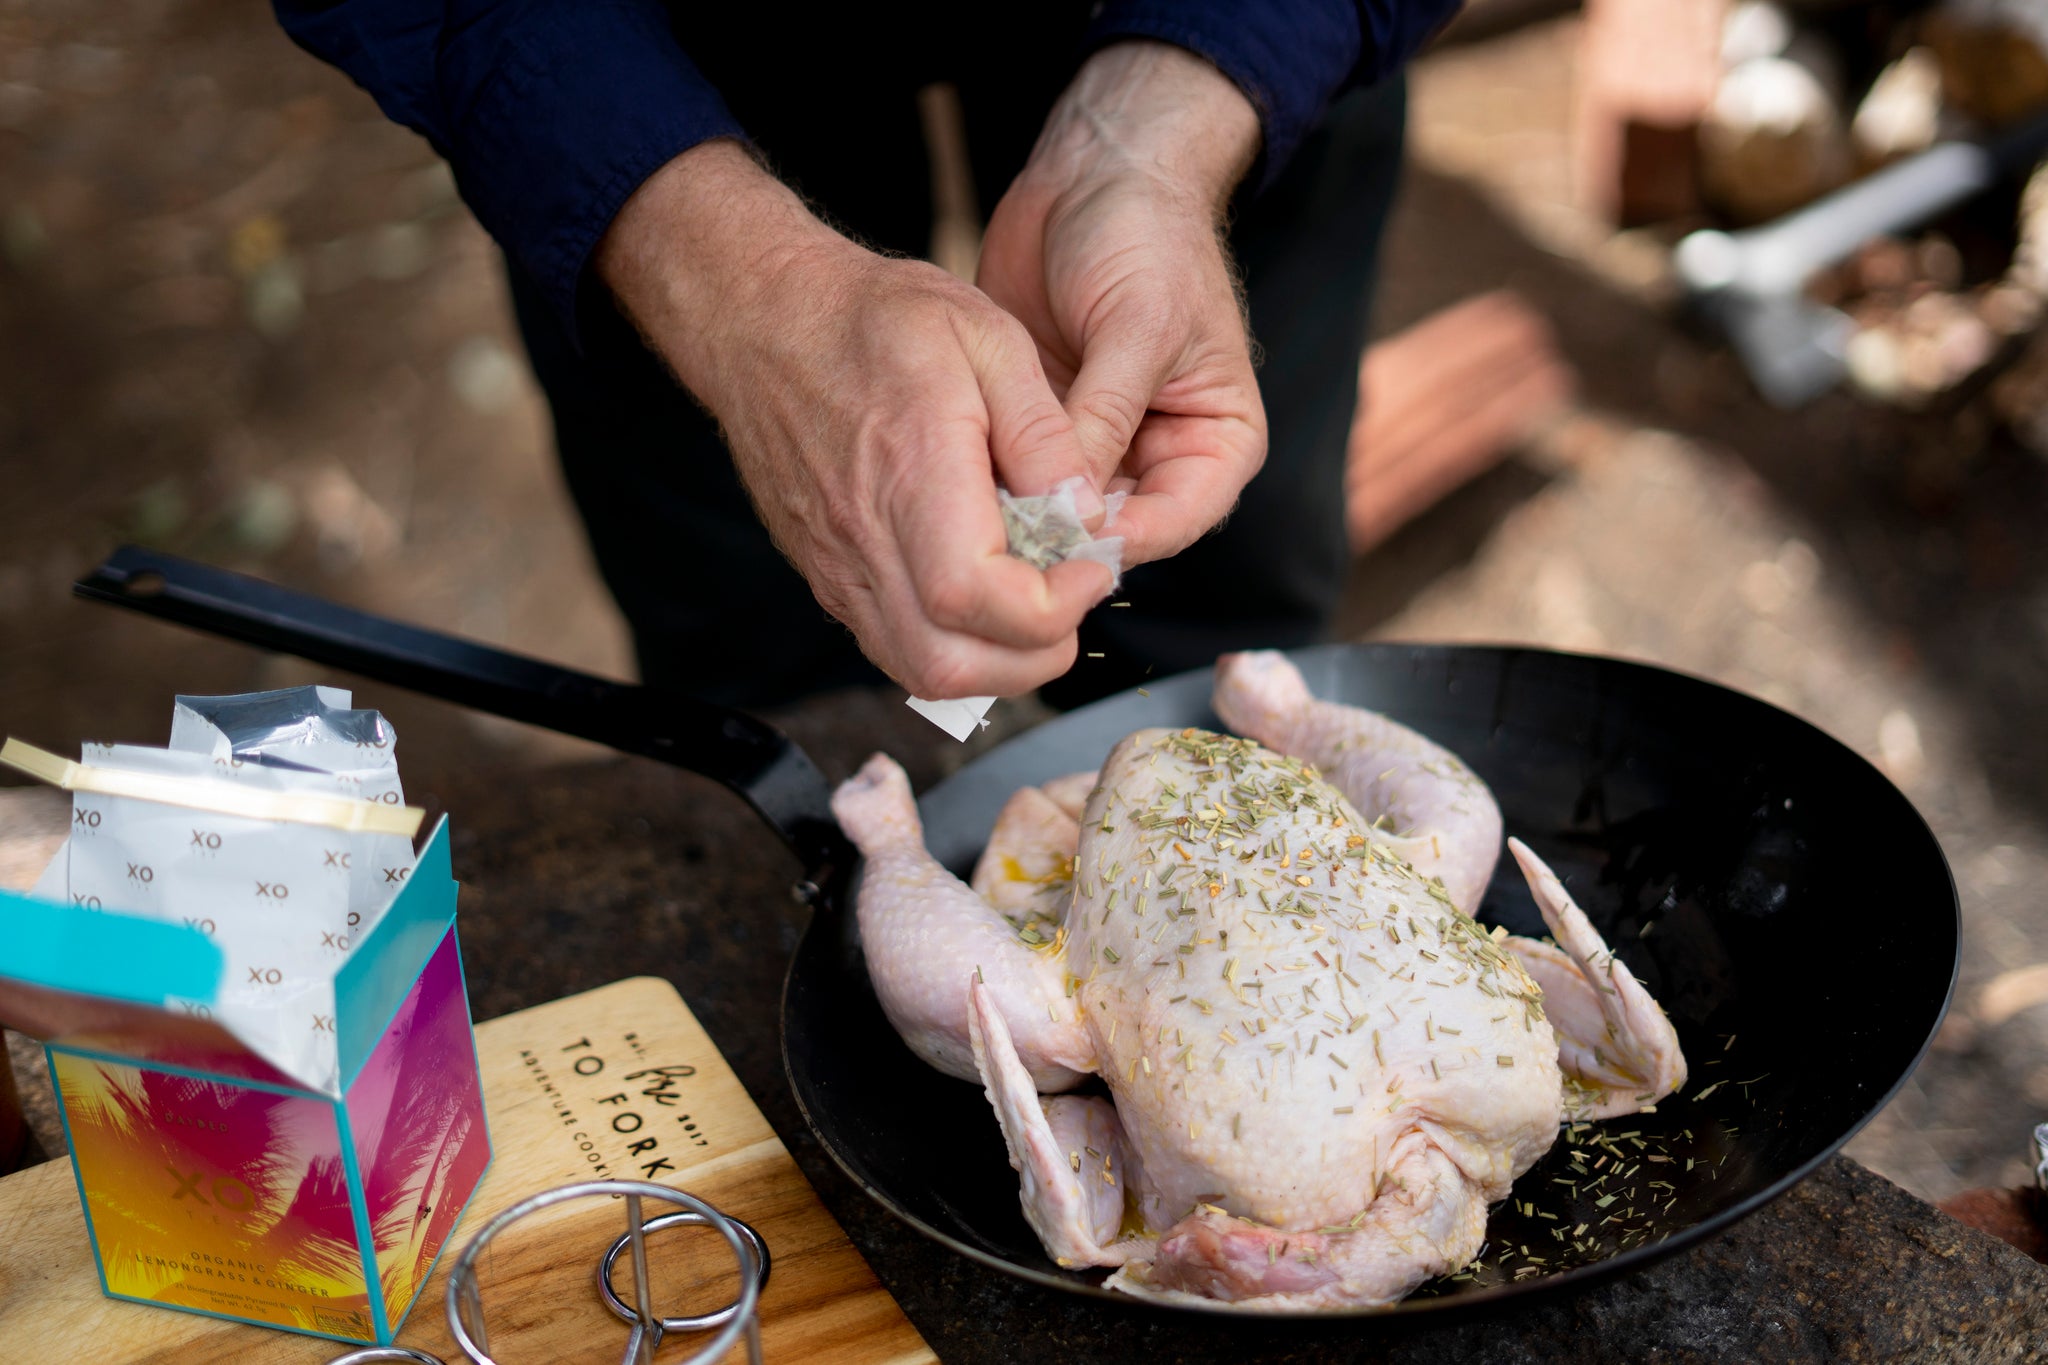
Herbal tea bags are perfect for adding a sprinkle of flavour. 📷 Fire to Fork
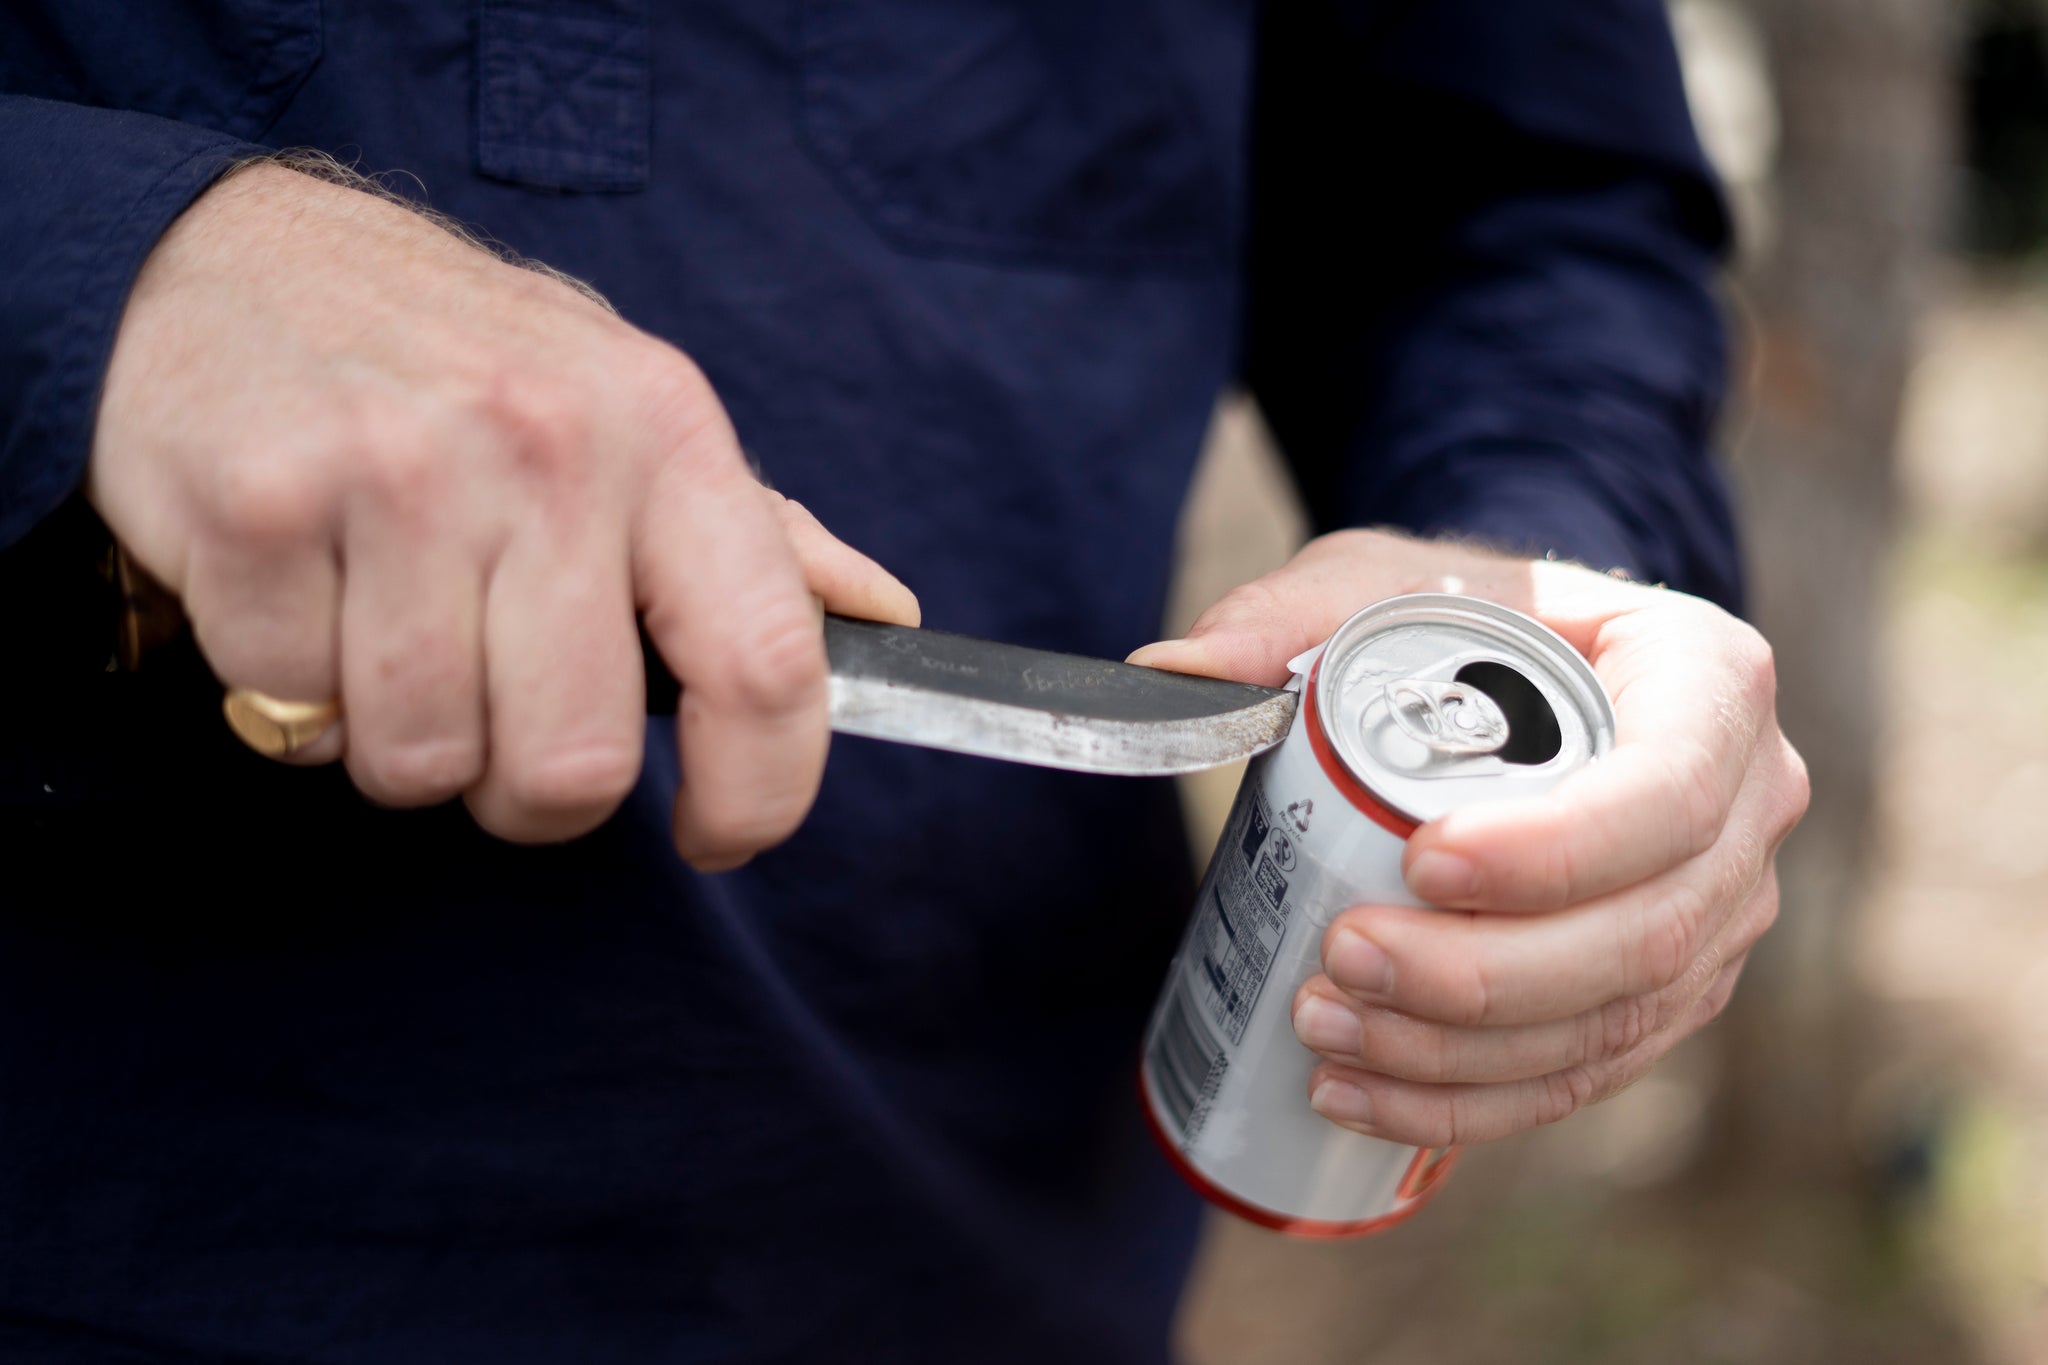
Beautifully handmade Swiss knife going straight through aluminium. 📷 Fire to Fork
You should be finished your first beer by now and standing next to an open fire is thirsty work. Cut the top off the can using one of Harry's expensive bush survival knives. Now from the fire with some long handled tongs carefully choose a few coals to drop into the empty beer can. This little beer can fire will seal the chooks cavity and start cooking the chook from the inside out.
Now you have a fire in the chook belly you best get onto cooking the outside.
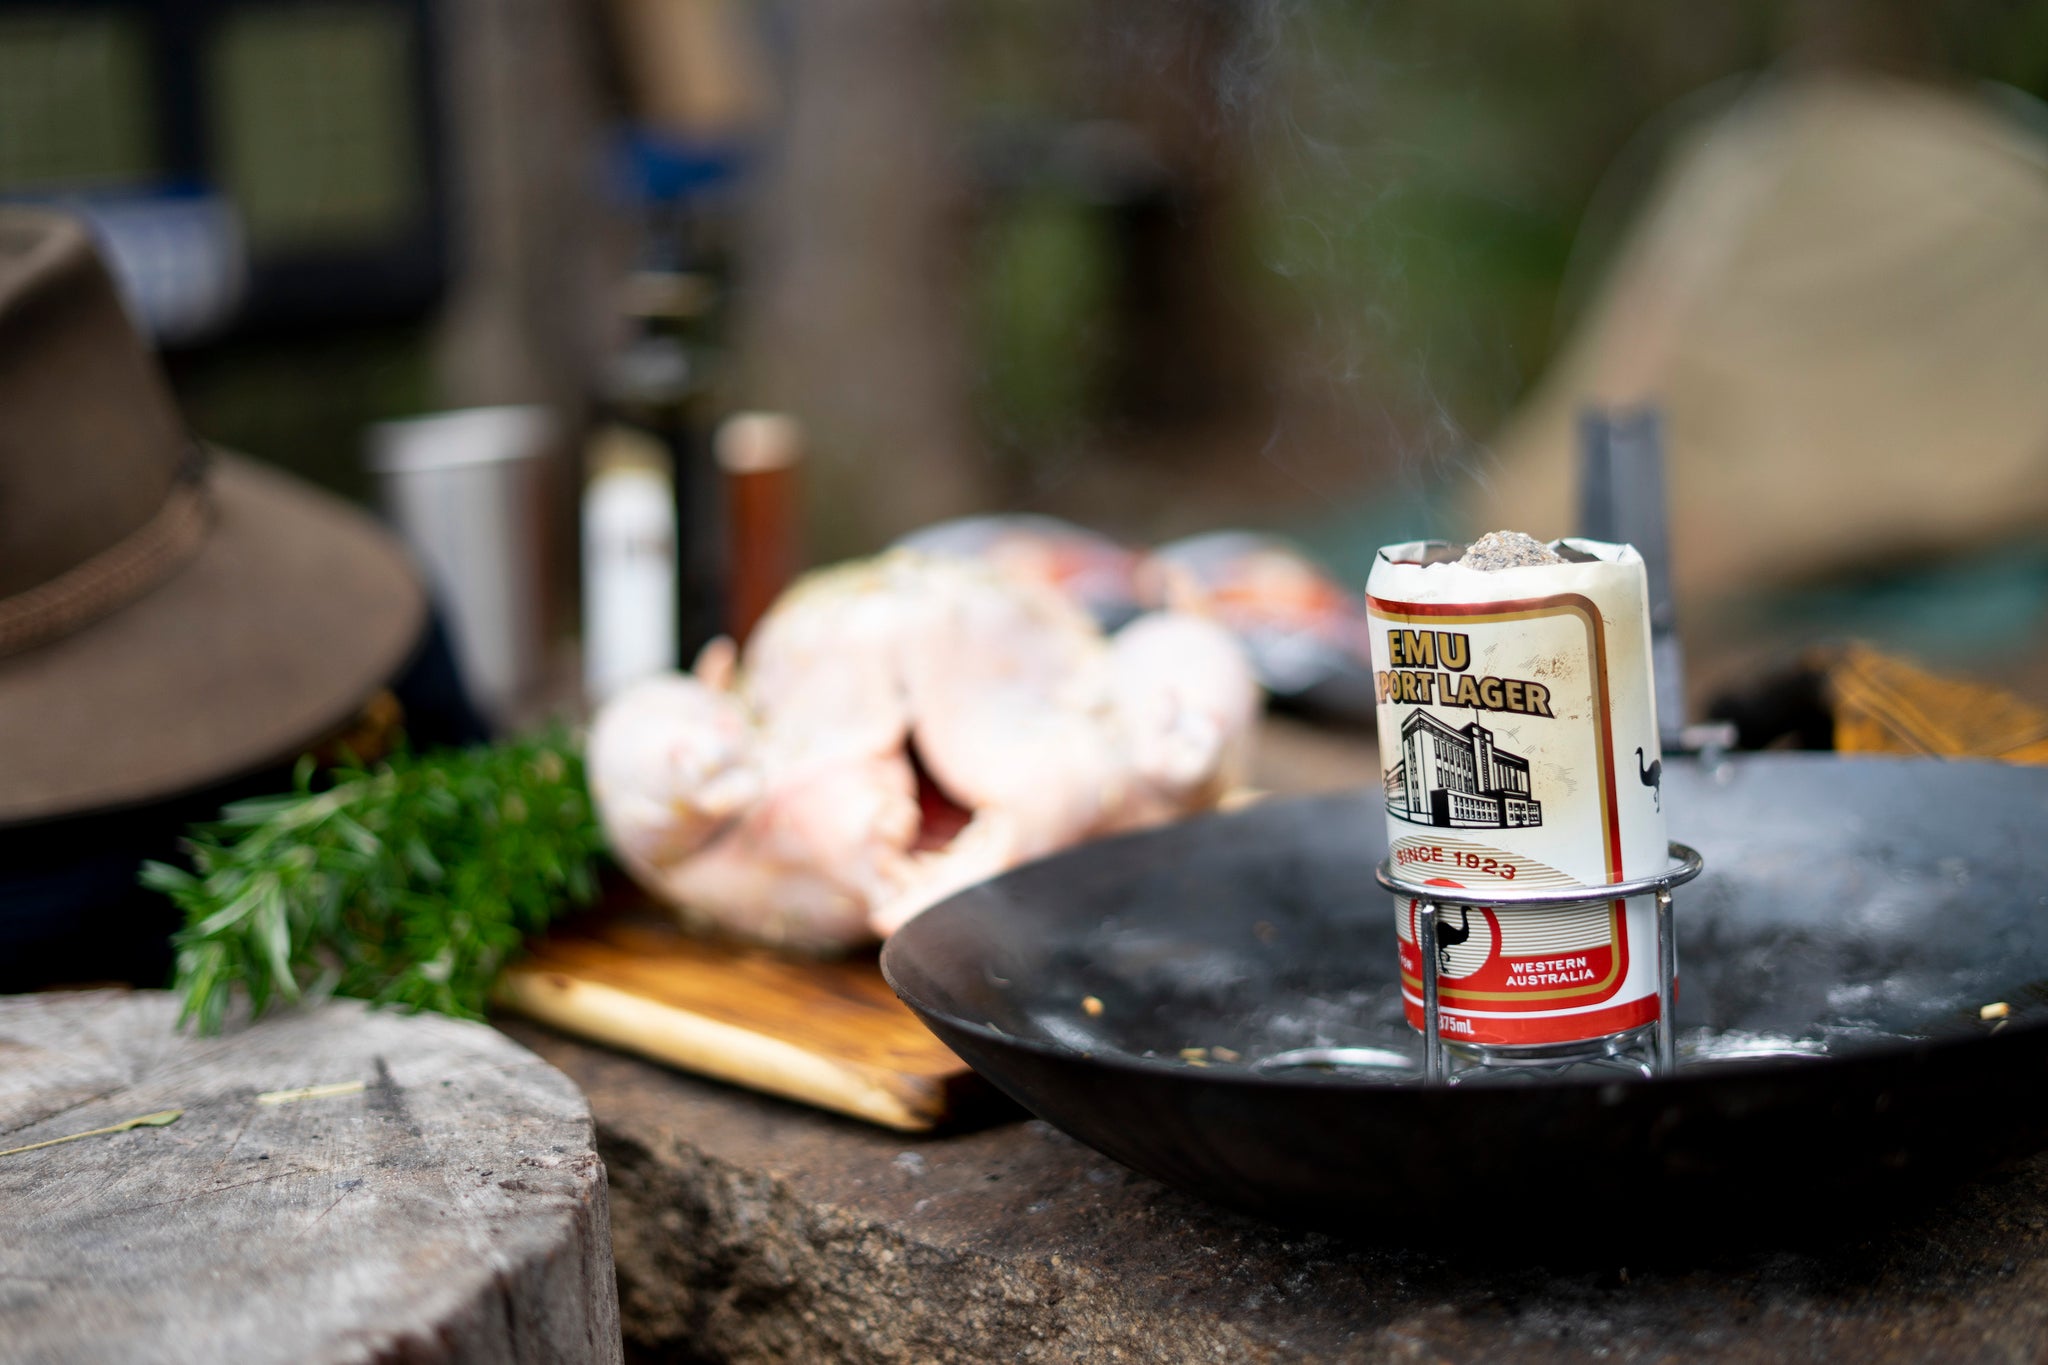
A little fire in a beer can. 📷 Fire to Fork
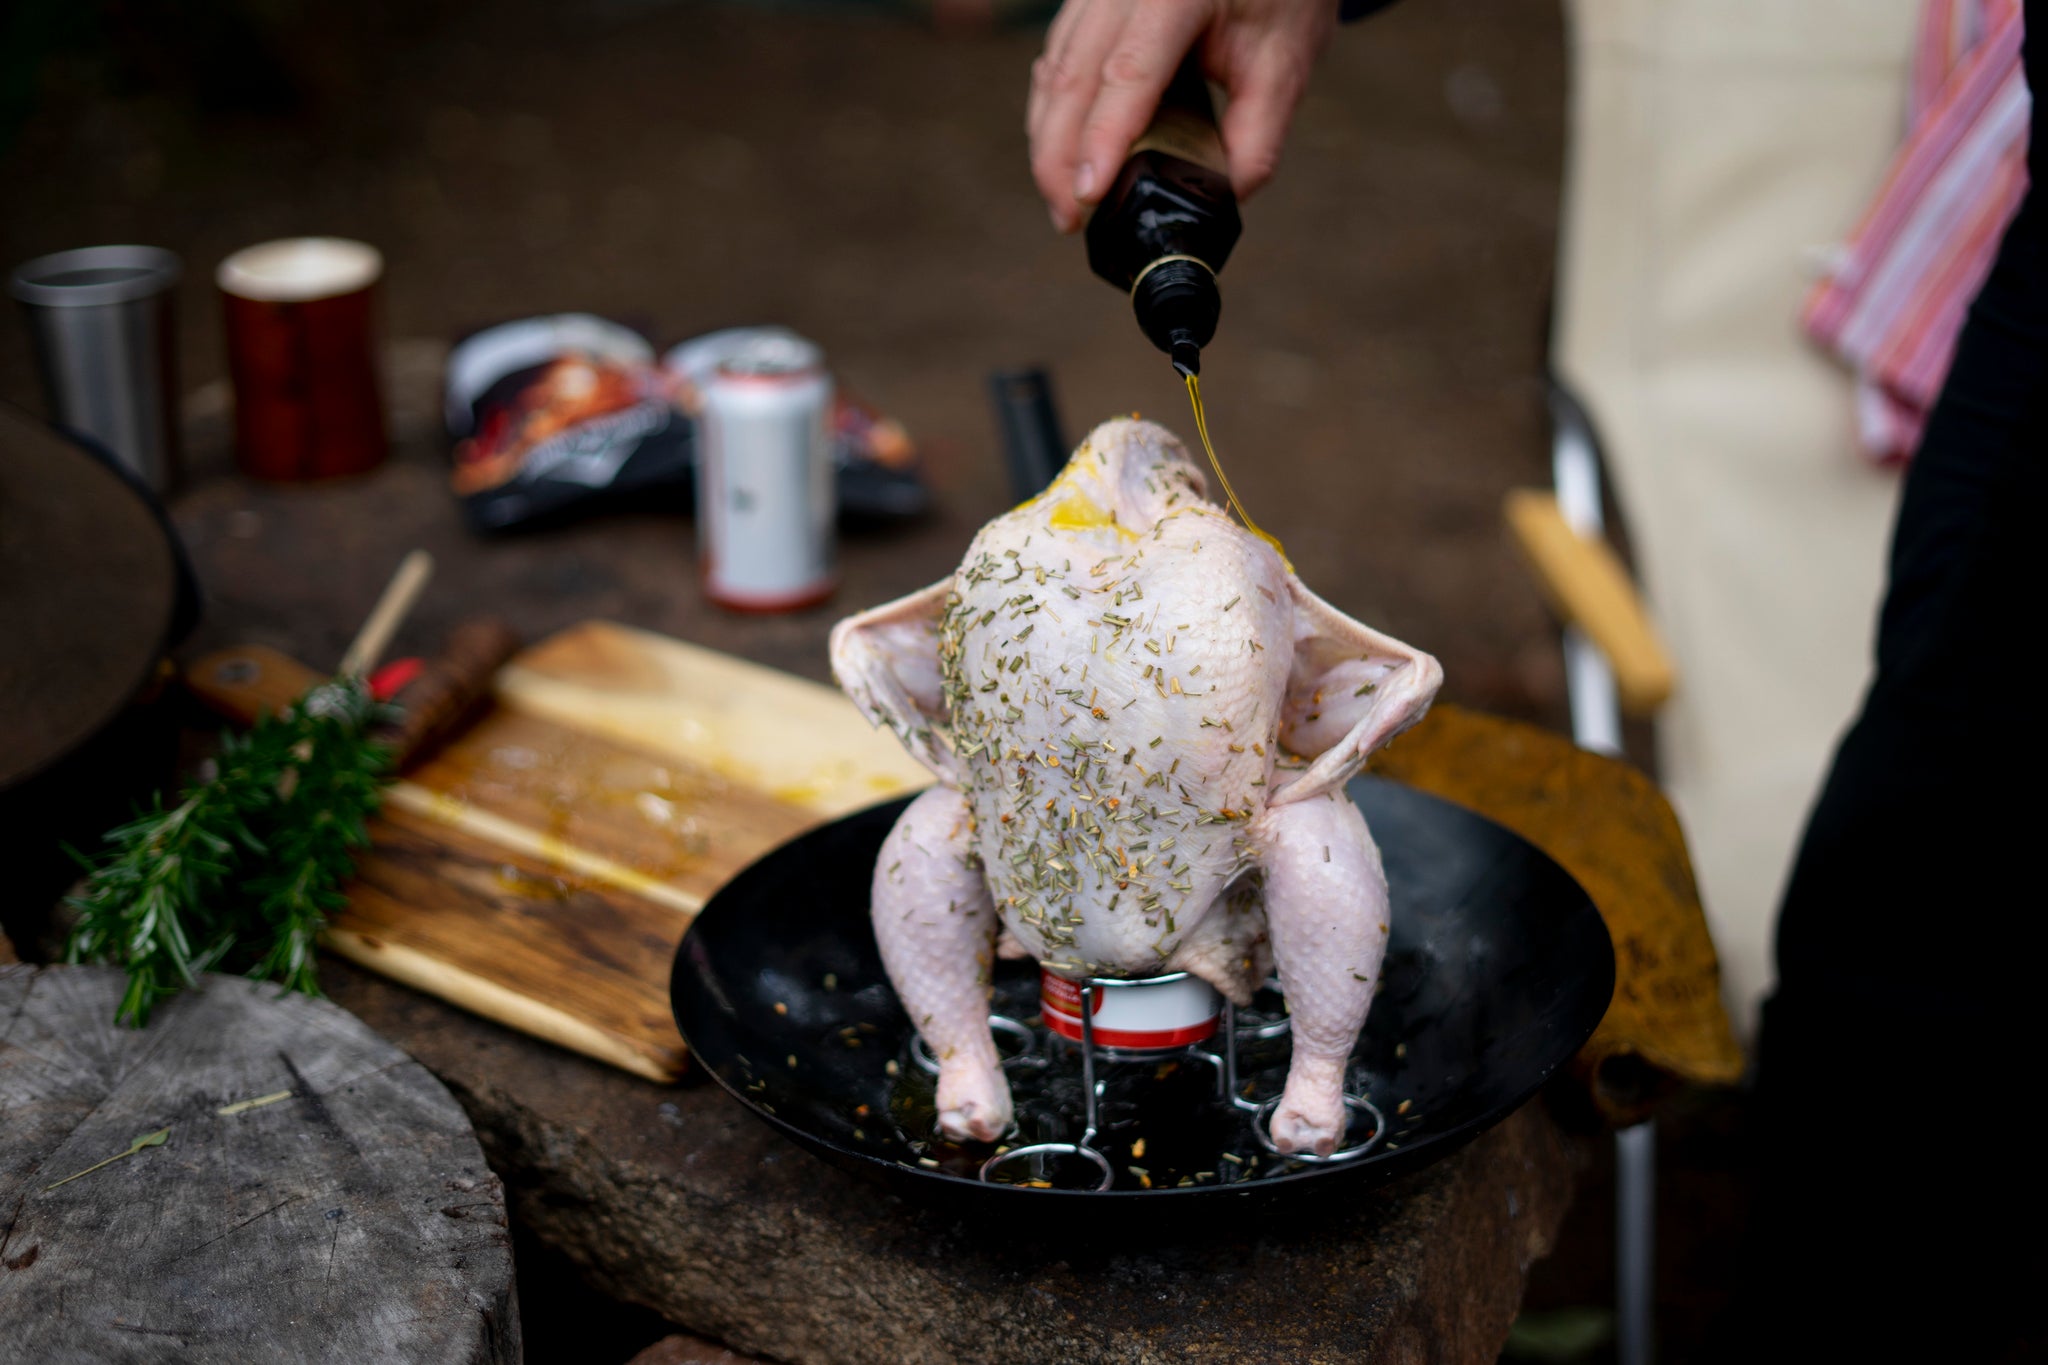
Hands on hips, ready for the fire. 📷 Fire to Fork
The wok was placed on top of a Frontrunner BBQ Grate and the chook was given a few minutes in between rotations. The fire was built under the BBQ grate and vertically up one side so heat would reflect onto the chicken sitting up like Jackie.
We used a Hillbilly wok from Grebmegear which was perfect for this cooking situation. All our preparation and cooking was done in it and the juices caught were used for basting and for the gravy. Roast chook without gravy? YOUR FIRED!

The Hillbilly wok being placed on the grill ready for the vertical fire. 📷 Fire to Fork
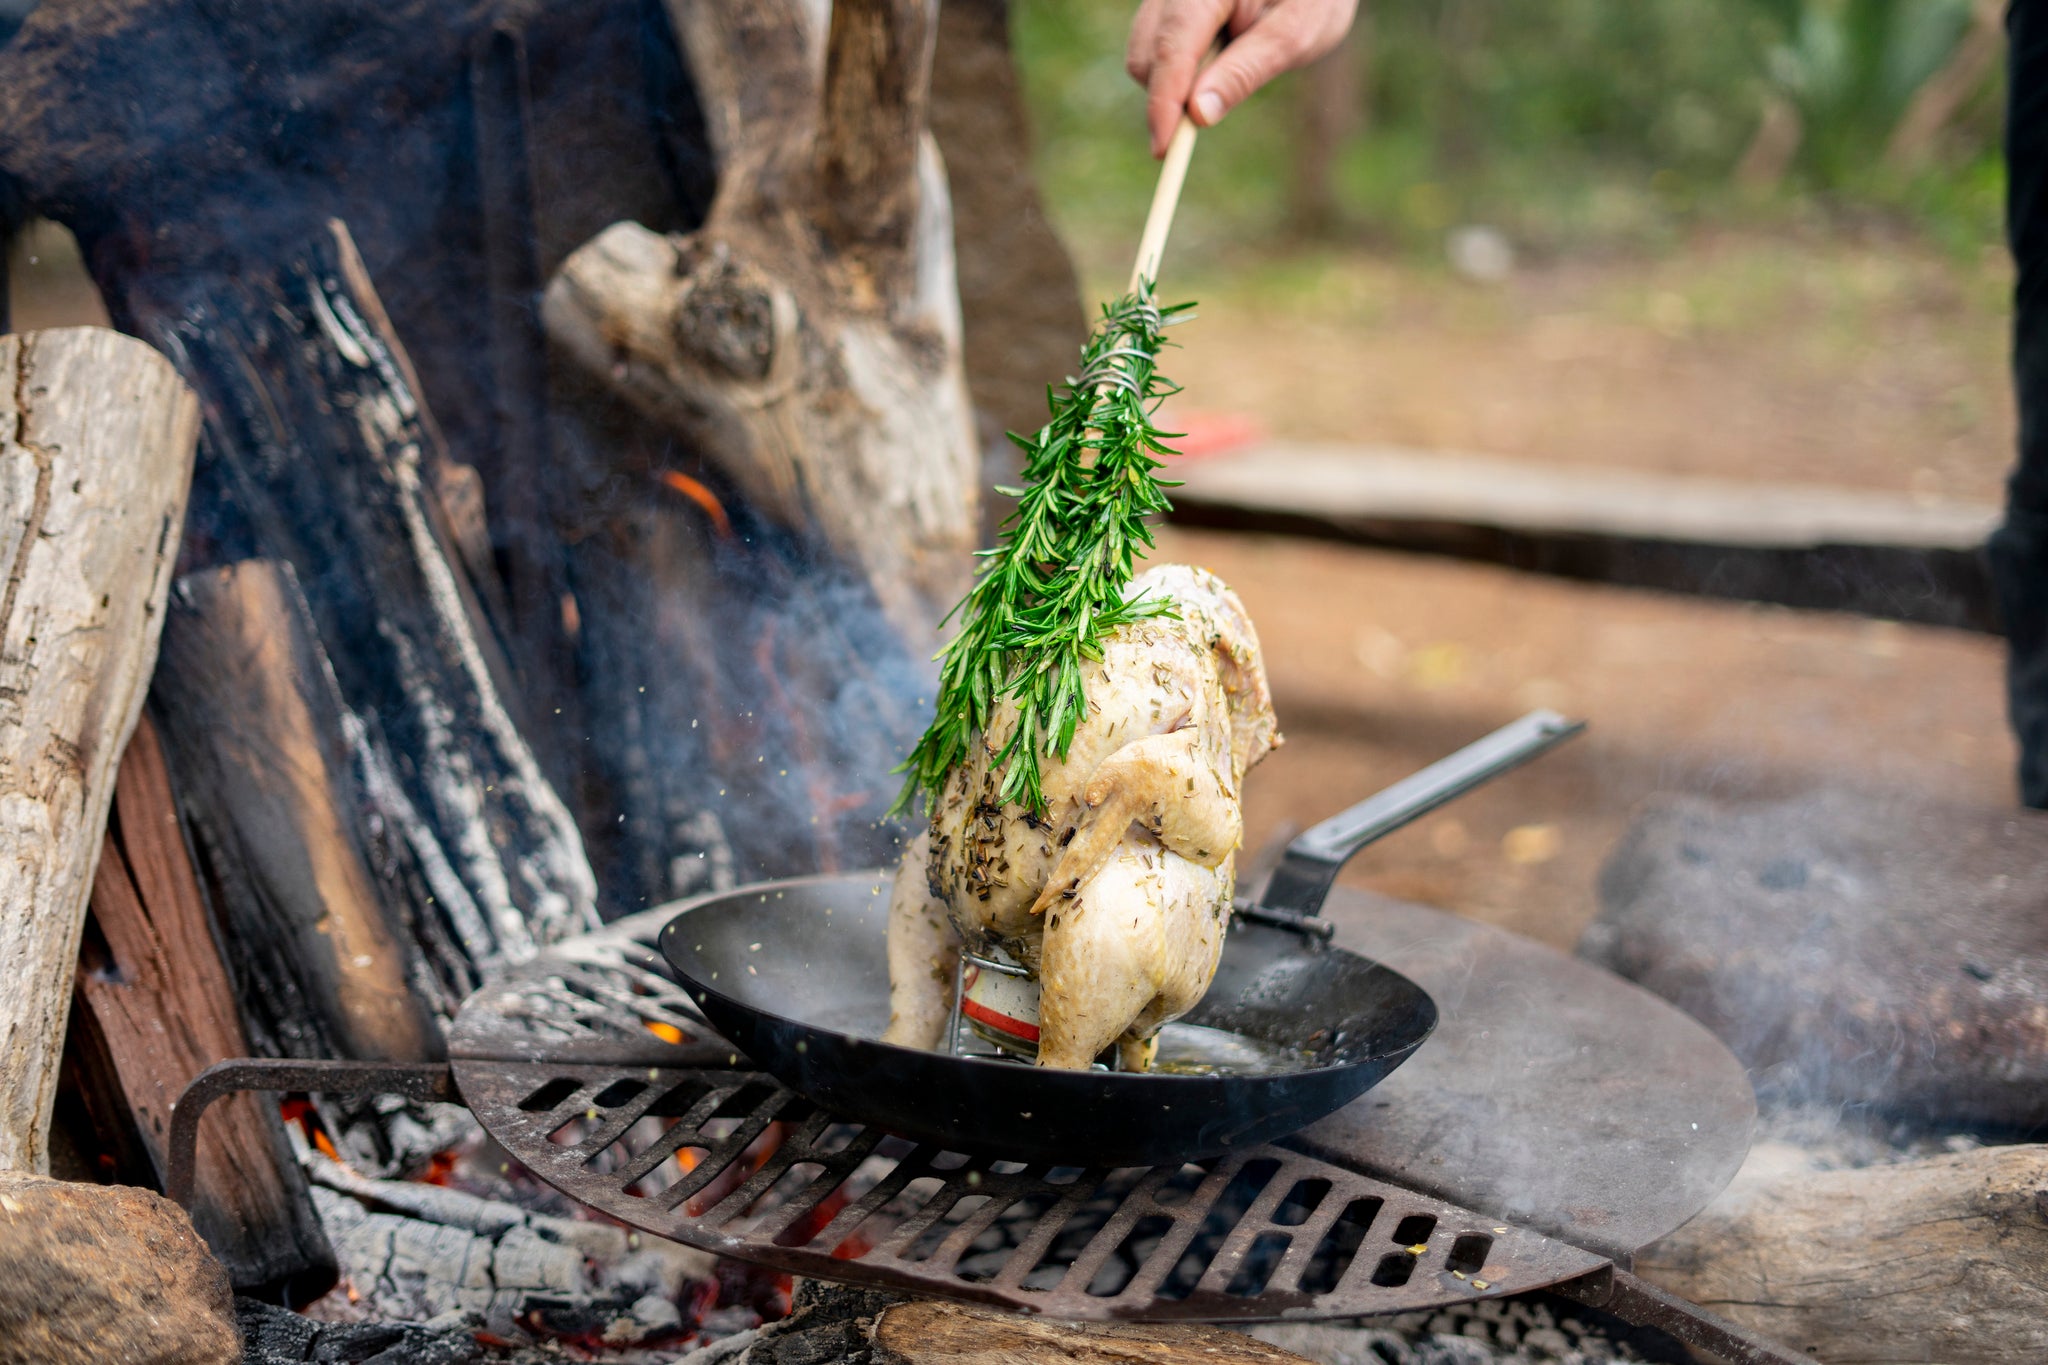
Vertical fire reflecting heat and between rotations the chicken was basted with all the drippings.📷 Fire to Fork
What temp for beer can chicken?
To take the guess work out I now almost always use a meat thermometer. Trust me, you will nail it every time with perfectly cooked meat. If you have a sixth sense and know when your meat is ready then ditch the thermometer. We pulled this beer can chicken off the fire at around 80 degrees C (176 fahrenheit). The thigh is the best test area to poke the thermometer skewer into. You are also looking for clear juices with no pinkish colouring.
More info on meat thermometers
Camping Food | Internal Meat Temperatures Blog
What sides go with beer can chicken?
Our side dishes were Cauliflower Cheese and Peas with gravy. We had leftover peas from the pies (blog to come) we cooked the night before as they were already hydrated so all we needed to do was reheat them. A pot of water was placed next to the fire and the bag of Campers Pantry Peas was submersed for reheating. The Campers Pantry Cauliflower was rehydrated with hot water then drained. In a mini cast iron pot we added a white sauce and topped with cheese. These were placed in the coals for a few minutes to cook as the Campers Pantry veggies are pre-cooked.
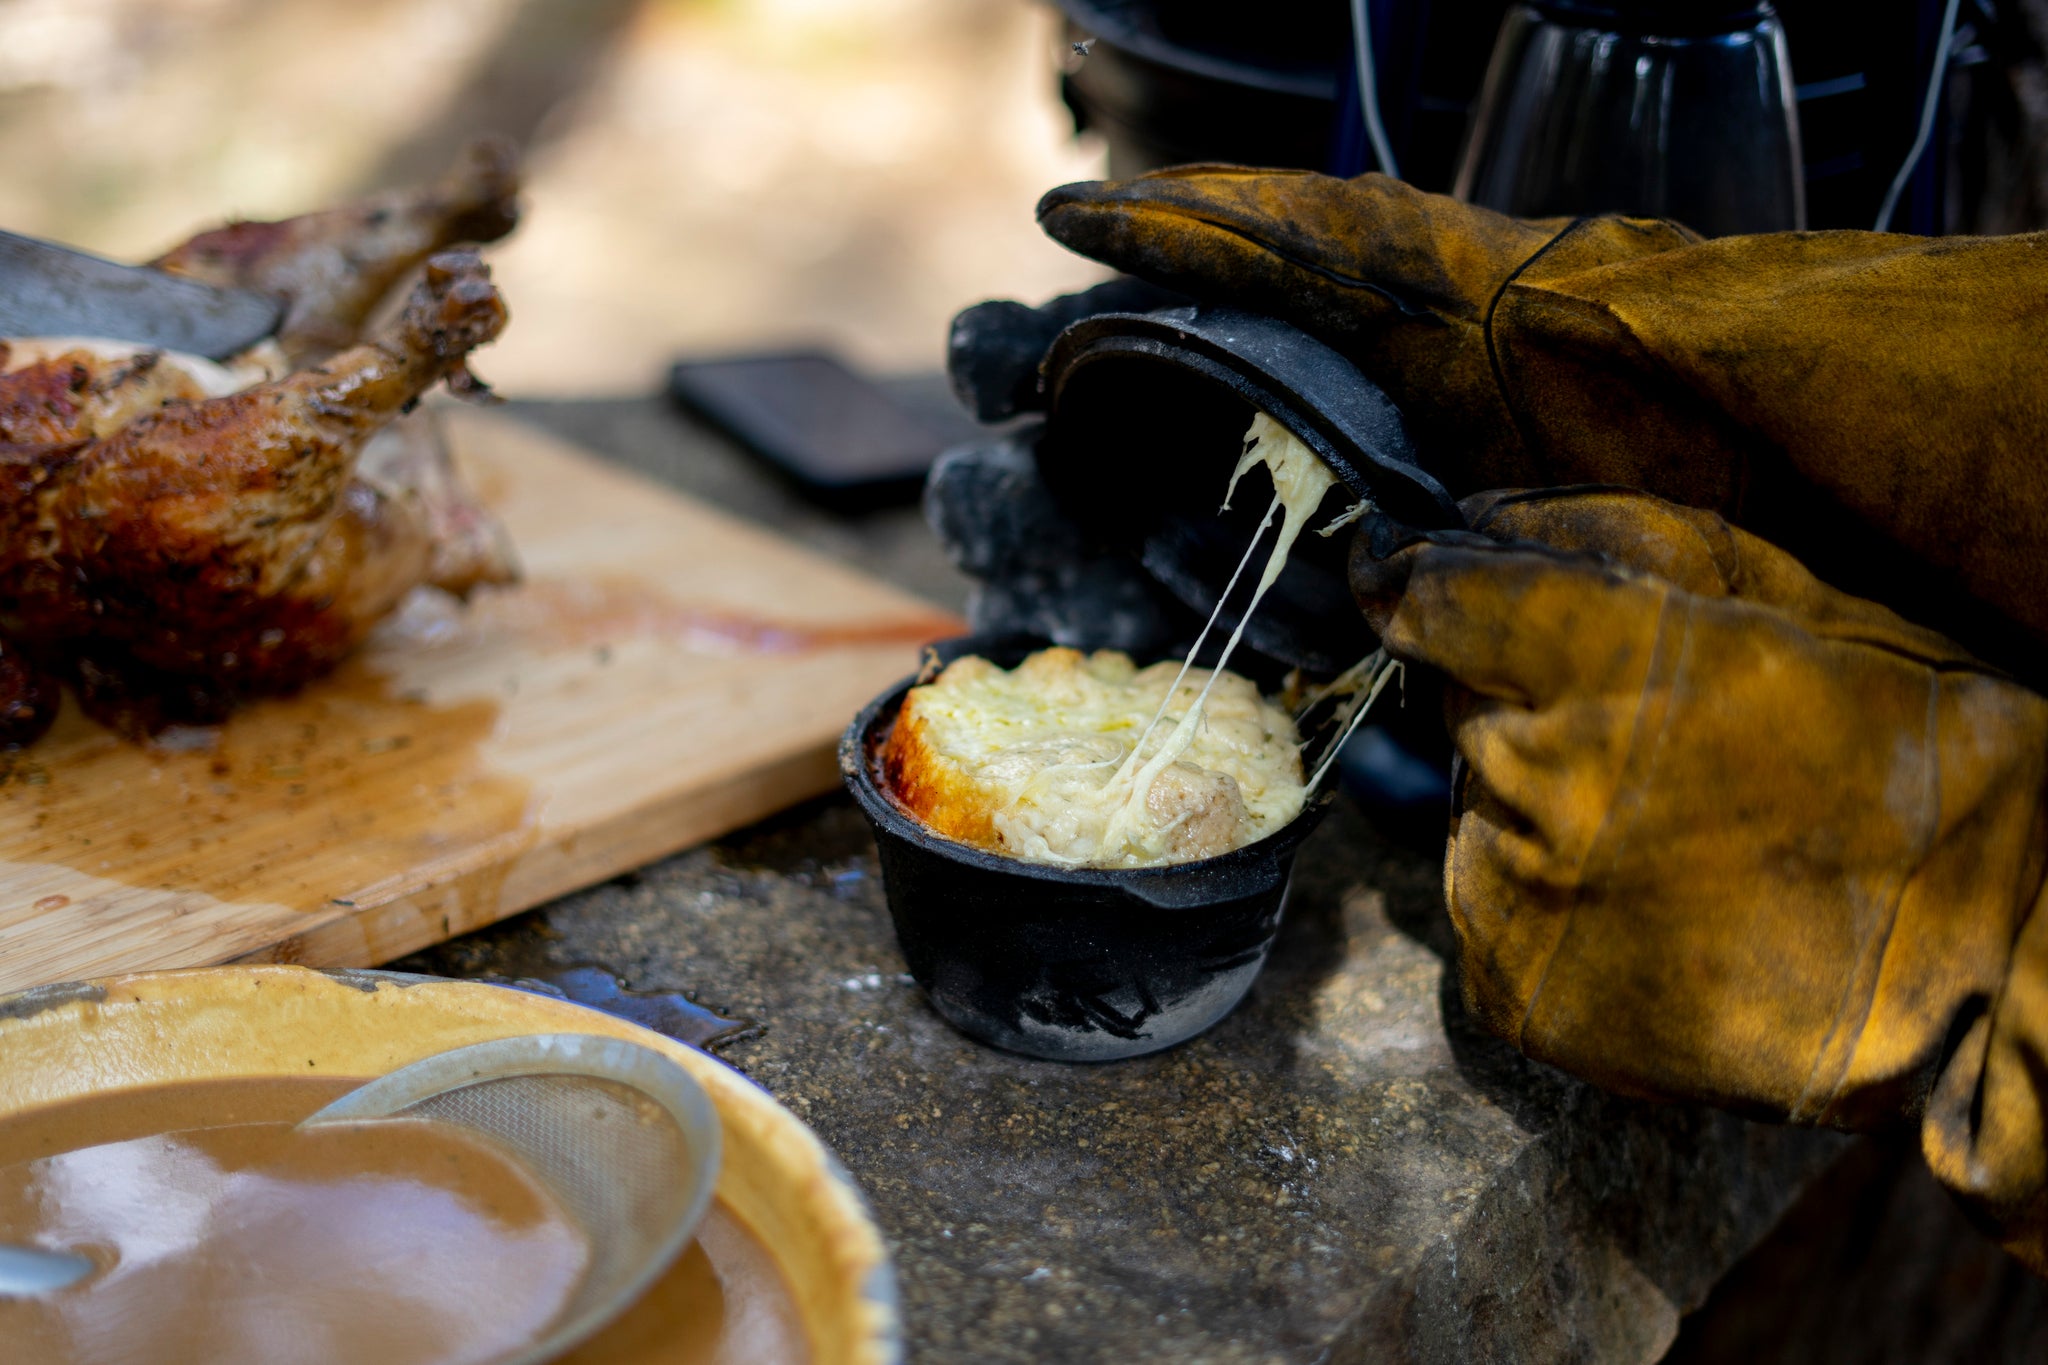
Cauliflower cheese smelling and looking the business. Absolutely delicious. 📷 Fire to Fork
For the gravy we used Greens Gravy Granules for deliciousness. Mix this straight into the dripping and keep stirring. We skim out the chunks for a smooth gravy but this doesn't need to be done if you're not fussed. Time to put a billy on the fire for the dishes to follow.
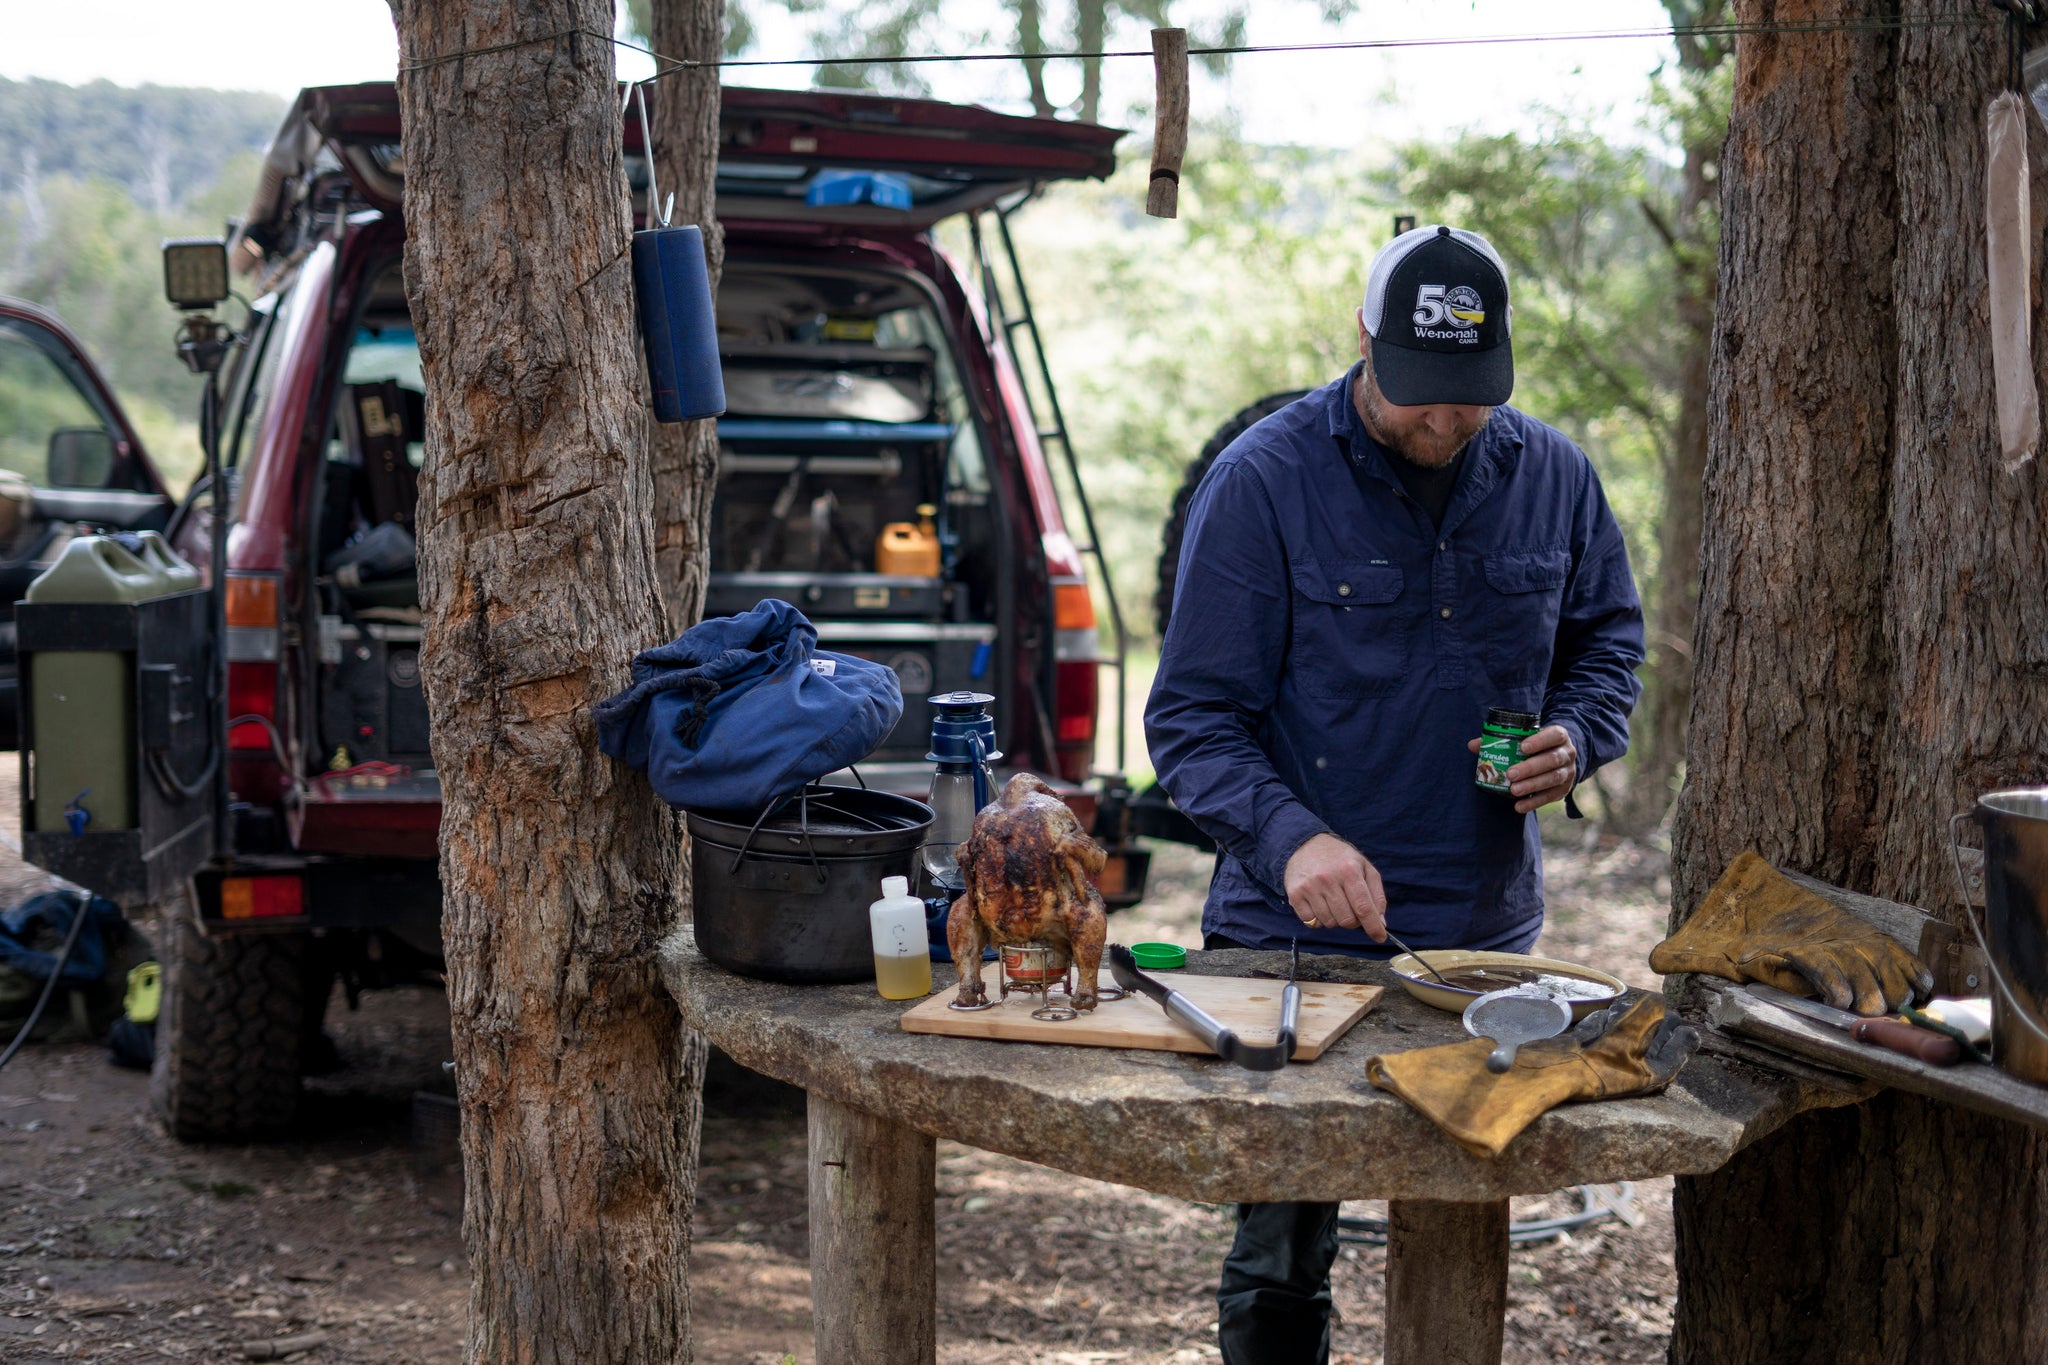
Gravy prep - let's keep it simple with Greens Gravy Granules. 📷 Fire to Fork
Plating up Beer Can Chicken
Time to carve and Harry has a few techniques up his sleeve. Here I was thinking the whole time "geez I forgot to remove the wishbone" as carving a chook with this removed makes for easier removal of the breast meat.
VIDEO below: How to remove a wishbone before roasting.
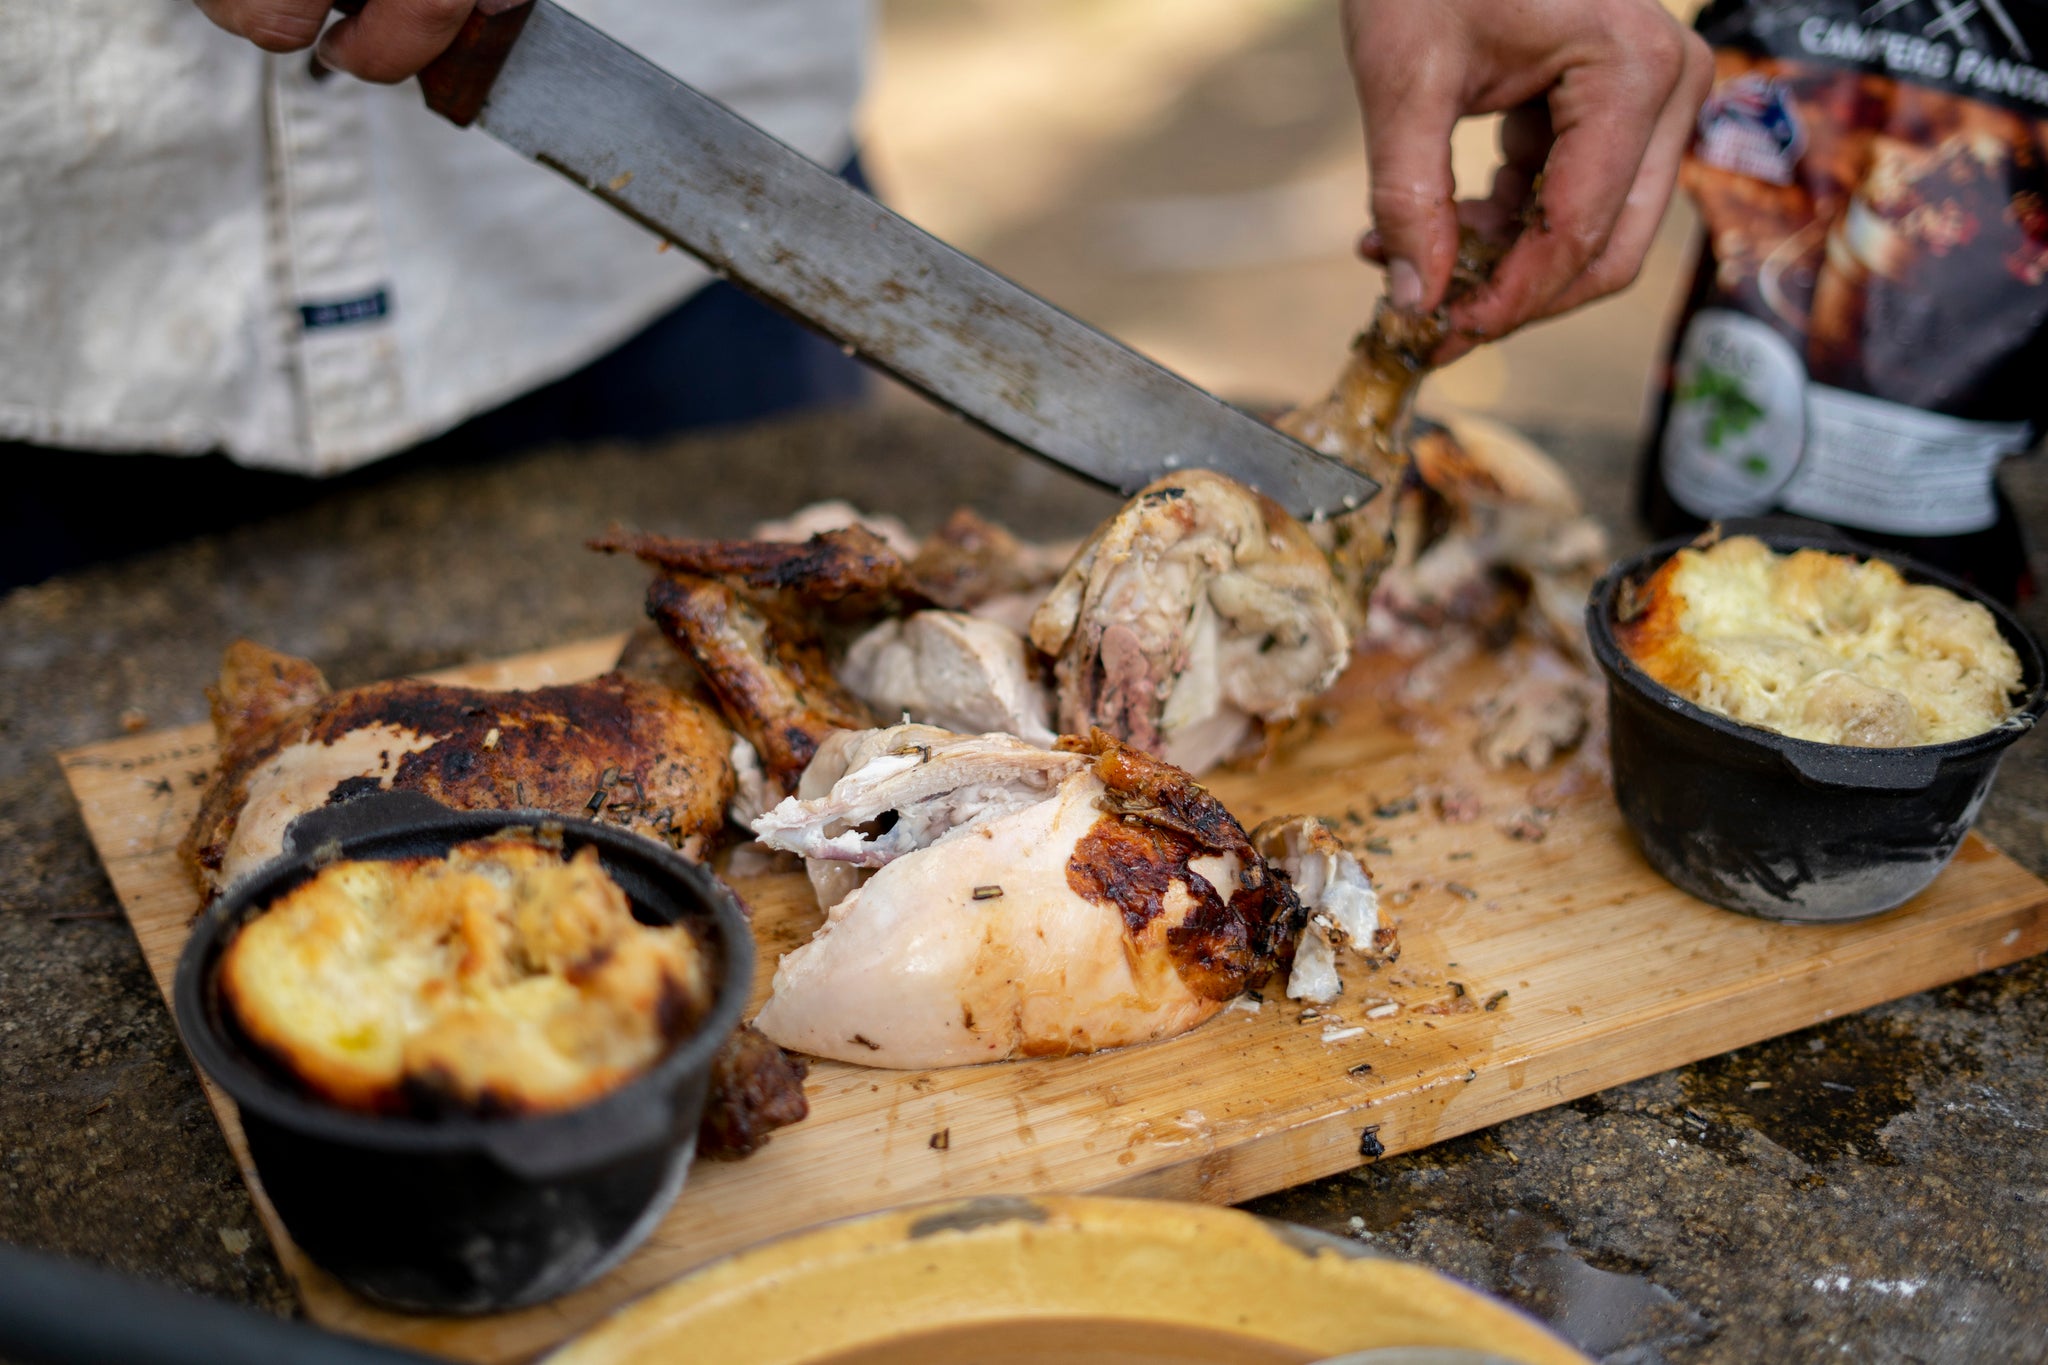
Enter Harry with sword in hand. Note the juices running out from the chicken. 📷 Fire to I'm Forking outta here!
We are really sorry as we took no more photos. The chicken looked so good on the plate with the cauliflower cheese, peas and gravy. The chicken was so succulent and juicy and we were so stoked with the outcome. We will do this one again for sure.
All photos provided by Harry from Fire to Fork - I did take a few rippas too but he does have a bloody good camera😁
Note* Beer can chicken is also referred to as beer butt chicken, chicken on the throne, dancing chicken, drunken chicken and now beer can coal chicken.
Cheers
AJ
Fire to Fork’s aim is to give everyone the ability to make tasty, simple and interesting food armed with very basic items and an ability to light a fire.
It doesn’t matter if you’re a first time camper or a seasoned overlander, as long as you have access to firewood, a knife and some basic ingredients; my mix of simple bushcraft and cooking will have you impressing your friends in no time.
Also in TAILGATE RECIPES

Bangers, Brussels and Mash
November 12, 2021

Meal Planning for Remote Off-grid adventures
September 10, 2021

Sous-Vide Lamb Rack in a Travel Buddy oven
May 12, 2021
We have a play around with a 4WD Travel Buddy Oven on a trip and try our hand at a lamb rack sous vide. Yep, that's right! Let's get a bit more into the low temperature this thing can sit on.
- Adventure Blog
- About us
- Become a Brand Ambassador
- Contact Us
- FAQ
- GEAR WE USE
- TAILGATE RECIPES
- TRAIL RECIPES
- Refund policy
- SCHOOL CAMPS
- SHIPPING
- Sponsor Me
- Terms of service
- Vegetarian
- Where to Buy
- Accessories
- SUDOKU
Subscribe to get special offers and trail recipes!
© 2024 Campers Pantry Pty Ltd.
ABN 21 620 419 365
Powered by Shopify


